Monday, February 28, 2011

Carnival Party!

This past Saturday we celebrated Jacob's and Wyatt's birthday with a back yard carnival party. They both had birthdays this month but we had put off the party while we were having trees from our yard cut down. (We had 45 trees removed from the front and sides alone! My hubby and I bought this house a few years back and this was one thing I really wanted to do.)

We had hot dogs, cotton candy, pop corn and soda for snacks.

                                      
I made their cupcakes, I used the same frosting recipe as Garrett's and Sweet pea's for the cupcakes for their birthdays. I just love the frosting! It is light and fluffy, not too sweet but sweet enough.

I also made the cotton candy holders. I used 12"x 12" scrap book paper. I cut the paper in half from one corner to the other corner and just wrapped it around to form a tub. Easy peasy!

Here is the prize table. The kids all played the games to earn tickets to win different prizes. They all had a Blast!

We had a Kissing both (sorry I forgot to take a picture of this one). The kids guessed to see how many Hersey kisses were in the jar. The closest geuss won the jar.

We had a fish bowl toss. I placed a fish in two of the fish bowls, both of those were bounes tickets. (I only put the pictures of my kids on here)


What fun is a water shoot game!

My son didn't relize I was taking his picture here, lol.

And Lawn bowling, I found this at Wal-mart. I thought the kids could play this one all summer long.

See all the dirt? This was from the trees being cut down. The trucks tore the yard up but totaly worth it to get rid of the trees!!

My oldest son, he loved the water gun game!

We had a ring toss game too. This was my middle son's favorite game. Sweet pea's too! She tried to put the rings onto the pole but she was just an inch too short, lol 


Then the kids got the idea to have a water gun fight. It wouldn't have been bad but it was around 60 degrees out that day. 

We also payed our fishing game too, but I forgot to take pictures of this too.  
Everyone won lots of tickets and prizes! I hope everyone weekend was just as fun!
Sharon

Friday, February 25, 2011

Week 1 of Weight Loss!

                                                       carrots

This last week I have been eating a lot of carrots!, to say the least I was starving by Sunday! I would much rather eat something yummy. ;)  But I am very proud of myself. I exercised every day and watched what I ate.

By the end of my week I have lost a total of..... 4 pounds!! I am so excited about this! I wasn't expecting this at all, I though maybe 2 pounds at the most. I am sure I won't lose as much on these next couple of weeks. I will be happy with 2 pounds a week. I will say today I did eat some hot fries a a spoon full of ice cream. I had a weak moment. ;) Better luck tomorrow!

Sharon

Tuesday, February 22, 2011

Go Fishing! Tutorial

For my sons' birthday party we are having a carnival party this year. I thought a go fishing game would be a lot of fun for the younger children. I know my kids sure do love it already! I wanted to make something that would last past their party so I used some scrap fleece I had on hand.
Here is what you'll need to make your own;

You'll need a 1/2 dowel rod
string leather
scrap fleece or felt, both will work just fine
magnet
paper clips
sewing machine
hot glue gun


 1; first drill a hole on the one end of the dowel rod, use a 9/16" drill bit.

Then tie one end of the leather string through the hole of the dowel rod.
At the other end hot glue the magnet to the end of the string.

2: print out the pattern for the fish here, for every fish you make you will need two cut out, a front and a back. I made 6 of each color so I cut out 12 of each color of fleece.

 3: Pin two cut out fish together. Sew around useing a zig zag stitch. Leave a 1/2" open at the mouth to insert the paper clip.
4: insert paper clip. (I place a paper clip on top to show what it looks like on the inside) Hand stitch the mouth closed, stitch around the middle of the paper clip to hold the paper clip in place.

Now let the kids enjoy!


Happy Crafting!
Sharon


Birthday, Birthdays!

 This Tuesday tutorial will be posted a bit later today due to we have been busy getting ready for a double birthday party! Yes another one, the kids birthday are all a couple of weeks apart. The two older boys' birthdays were earlier this month but we are having their party this weekend because we had all our trees cut down from our yard. It was about 70 trees, front and back. We are still cleaning up the yard a bit but it looks great!
 Here is birthday boy #1, he is our oldest. He looks up to his grandpa so much!
Birthday boy #2, he is not even a year younger than our oldest. He was at his big brothers very first birthday party, that was weird for me. ;) They were both 7 for about two weeks!

 And a little sneak peak at the party theme. (the ones on hte left I made) Can you guess what it is?
The tutorial goes with theme as well. I will posted later today so look out for it this afternoon!

Sharon

Monday, February 21, 2011

Oranges and Ruffles

I have been thinking about hot summer days, sandy beaches, beautiful blue skies and smell of salt water on a warm breeze! This outfit reminds of of the Florida coast. I'm not sure if it's the oranges or the bright blue sky color back ground. :)


I made this outfit last night. I uesd McCall's #6270. When I bought the pattern I loved the outfit but also really loved the fabric. Then one night I was on the Hancock website and found the exsact same fabric! I had to have it! I was very surprised when I recieved the fabric in the mail, the fabric was brighter and prettier. In the picture it looks like a purple back grougnd when it is a viebrint blue. The picture does not show the color as beautiful as it does in person.
I did change the pattern a bit though. One thing is on the back I made a fabric loop for the button. I am going to put a fabric covered button on it. (I have to run down to the store later and buy a pack seeing I decided to add it at around 3 am, why can't Hobby Lobby be open 24 hours )
I really do love all the ruffles on this top. I can't wait to see it on Sweet pea!

Sharon

Friday, February 18, 2011

1 Month 2 Win it, I made it!!

The 12 have been picked for season 1 contestants for 1 month 2 win it and I was chosen!! I am so excited! .


It is a crafting competition that last 4 weeks and there is great talent chosen so this will be a lot fun. :) Check out the contestants over at One Month To Win It 


Wish me luck!
Sharon

My New Best Friend!

 My serger came the other day! I was bit nervous about threading it but it wasn't bad at all. The whole thing is color coded and label on how to thread the whole thing. Isn't wonderful?!?

The first thing I made was new PJ's for my boys. I have been wanting to make these for a couple of months now and it was the perfect time to get these done. :)
 Here is one of the first lines I serged. I love the look of the finished product!
 And here is another look at the inside of the PJs.
 The finished jammies! The boys really liked them. I used flannel for all three sets. I still need to add the buttons and button holes to the tops though.
 I used a Simplicity pattern. It was easy to follow and went toghether quickly. It has the size for child 4 to adult XL.
                                   
I have been playing with my serger trying to figure out all the things I can do with it, next will be a rolled hem!
Happy Sewing!
Sharon

Thursday, February 17, 2011

A Little Extra Weight

This post is not about crafting, well I am trying to Craft myself into a better person. ;) Since I have given birth to Sweet pea I had gained 50 pound and  needed to lose 50 pounds. Over a year later and I still need to lose 50 pounds. gasp! Where did the first year go?!? None of my close  fit, still. So it's time to take action!!!


I am going to post every Thursday on my progress. I am hoping you ladies can help keep me in check. :) My hubby is great but not very good at the weight loss thing. (he say "hunny you look fine", as he is eating what ever he wants, darn men!) He did buy me a Wii fitness board and The Biggest loser game last year. (I know, very sad I really haven't used them. I am very lazy, lol) This year he bought me a Zumba game for it. Sweet pea just loves it! I had to hold her the entire time! The girl loves to dance!

When I reach my goal, losing 50 pounds (I am not telling how much I weigh right now ;) ) I have a pile of patterns waiting for me to be sewn up.


The first thing I am making will be this gorgeous jacket from Sew a Straight Line.  Love Love It!!

                     RSRTpeachtopside.jpg

And this top from Made by Rae. I love the way it looks comfy and nice and cool for the hot summer months. I want to also make Sweet pea a matching short dress with bloomers underneath, I think that will be so cute on her!


Well, wish me lots of luck on my first week!
Sharon

Tuesday, February 15, 2011

Ruffles & Flowers Apron Tutorial

 Last Saturday night I was dreaming and was making this apron for Sweet pea. (came out pretty cute?!?) I had bought the fabric for something else but it worked great for this apron. I love those dreams where I get great ideas for making things! :) I thought I would share how to make this ruffly apron with you this Tuesday tutorial.

 I bought a fat quarter pack and a jelly roll pack for Wal-mart. I love the bright colors! I used the same colors and Sweet pea's pillows for her bed and I will be using them for a dress for her this spring. I am including the size the pieces are cut into so you can use any fabric and not just the jelly roll.

Cut this for the child size apron;
*top: 10"x 10"
*skirt: 14"x22"
*bottom ruffle: 2 1/2"x 43"
*top ruffle: 2 1/2"x  43"
*ties: (2) 2 1/2"x 43"
*waist band: (2) 2 1/2"x 14 1/2"
*top tie: 2 1/2"x 22"


cut this for the Toddler size;
*top: 6"x 6"
*skirt: 16"x 9 1/2"
*bottom ruffle: 2 1/2"x 32"
*top ruffle: 2 1/2"x 30"
*ties: (2)  2 1/2"x 16"
*waist band: (2) 2 1/2"x 10 1/2"
*top ties: (2)2 1/2"x 16"


***sew in 3/8" seam allowance***

 Take the top piece and round the two top coners by traces a small bowl or cup.

Take the top ruffle and fold in half lenght ways, with wrong sides together. Press.
 Run a gathering stitch on the open side of the ruffle, a 1/4" from the egde.

                        
 Match the center of the top to the center of the ruffle. Gather the ruffle up and work it until it it fits both sides of the apron. Pin in place.

.
 Sew the ruffle onto the apron then serge or zig zag the egde to seal the fabric.  Press open with the seam towards the inside of the top piece

Now take the apron skirt. Hem the sides of the skirt (the short side), press under 1/4" and then again another 1/4". Sew. Do this to both sides.

Take the bottom ruffle hem the short sides the same as the skirt (under a 1/4" and then again a 1/4" pressing and then stitch). Now take the bottom ruffle and press the bottom of it under a 1/4" and then again under a 1/4" and stitch.
Now run a gathering stitch on the top side of the bottom ruffle. Match the center of the ruffle to the center of the skirt bottom, gathering until you like the look. Pin place. Stitch. Then serge or zig zag the edge to seal the fabric.

 Press the ruffle open at the bottom.
 Working with the ties, fold in half lenght wise with right sides facing. Press. Stitch the closed with leaving one short end open for turning. I tarpered the sewn end. 
 Turn and press.
 Now take the waist pieces and the top of the apron. Layer them all toghether. Lay the a waist piece down first with the right side up. Next place the top of the apron , centered on the waist piece, right side up. Last take the second waist piece and place it ontop with right side down. Pin in place and sew.
 Press both sides of the waiste down towards where the skirt will go.
Open the waiste up with the top of the apron closest to you.

                                     
 Gather the skirt with leaving a 1/2" of the waiste band on both sides. PLace the ties onto the top of the open waiste band as well.
 Here is a close up picture of the waist band and ties. stitch the up the side (where the tie is) then across the bottom (where the skirt is pinned) and then up the other side (where the tie is). Sew the ties twice to reenforce.
 open the waist band up with the wrong side up. Press the sides in and press the under a 1/4".
 Fold over and pin in place, with the apron skirt sandwich between the waist band pieces.
 Here is what the inside will look like.
 Sew the the side, then across the bottom and up the other side again. Use a 1/8" seam allowance. Sew over the sides again to give extra streanght to the ties.
 Take your top ties, you can use the single strap or the ties for this part. THe top ties for the child is the same as the toddler size.  For the double ties, make the same as the ties backs. For the single strap, fold over long ways with right sides together. Sew the long end up with leaving the ends open. Turn and press.

Pin the ties onto the apron top onto the left and right sides. Sew a square to attach the ties onto the aron. That's it your done!!
 I made a child size and the toddler size, I am not sure what I will do with the bigger apron yet. It fits my boys but the don't like it for some reason. ;)  
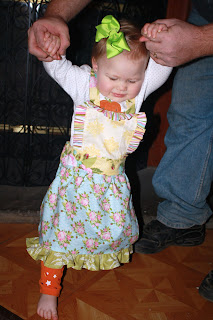
 Sweet pea is ready now to get cooking! Next I want to make her a play stove and felt food. Maybe I make a pot holder to match her pretty new apron this week.

Happy Sewing!!
Sharon