Thursday, September 29, 2011

Traveler Dress Sew Along Day 3!

Good Morning! Sleeves, attaching skirts and button plackets, OH My! After today it will really  start look like a dress and be almost done! Yippy!

 I made view C so my sleeves have gathers in them. You are going to make the garters on the top of the sleeve and the bottom of the sleeve between your markings that you transferred from hte pattern. To make a gathers stitch I set my machine to the longest stitch, which is a 5, and to the set the tension to the 8. My machine will gather my fabric for but be sure to leave long tails of thread to adjust the gathers as needed.
 Next take the sleeve on pin the two short ends together with right sides, as to make a circle, together and stitch.
 Now for the sleeve cuffs, we need to add interfacing to both of them. Cut the interfacing the same size as the sleeve cuff and iron on.
 pin the two short ends together with right sides facing and stitch together. Next press up one side of the sleeve cuff. Repeat with second cuff.
 Oh this is my favorite part of making the sleeve! Take the sleeve cuff and slip it over the bottom of the sleeve with right sides together, matching up the raw sides.
 First I pin the none gathered spot then I work on my gathers so they are nice and even. I think I tend to over pin here but want the gathers to stay put while I am sewing them in place. Stitch in place. Now turn the sleeve right side out and fold the sleeve cuff up toward the sleeve so that the seam of the sleeve/cuff are to the inside of fold. (sorry no pic here) This will be your already folded pressed edge here going up. Pin in place and stitch. Done!
 Now to attach our sleeve to our bodice I did the same as the cuff of the sleeve. I start at the bottom of the sleeve, matching up the side seams and pin the none gathers areas first then work my gathers so they are nice and even across. Stitch in place. Now here I finished my seams with my seger but you can sew a same zig zag with you sewing machine to finish off the edged.
 Tah Tada! a pretty sleeve!
 Now on to attaching the skirt. If you made view A or B this part you will not need to do. First sew together the three skirt pieces and finish the seams. Run a gathering stitch across the top between markings. Pin the bodice, matching up side seams and adjusting gathers. Stitch together then finish the seam.

 Now the hem the dress. I did make my hem longer than this but this is just to show you how to make the hem. First press up an inch. (I know that's knot what I am showing here. ;)) then...
 Fold hte raw edge under the to the fold and press again. Stitch as close to the inside of the fold as you can.
 This is where we are at now, looking better!
 Onto the part of the day, the button plackets! Take the interfacing's and iron them onto the top and bottom plackets. The sew the top and bottom plackets together. You will have four of these top and bottom pieces when sewn together.
 Taek one and pin it to the side of the dress matching up the seams on the bodice and the button placket, with raw edges together. stitch. Repeat with other side.
 Take  seam and press towards the button placket on both sides.
 Now take the last two button plackets and press the one side in.
 Take the button placket you just pressed and pin it with right sides together, matching up seams of top color and bottom color. Stitch.
 Here is what the bottom of the stitched placket looks like, you are going stitch across the bottom of the placket too. Be careful as not to sew the bottom of the dress hem into this but be as close to it as you can. Trim and press for a lovely button placket! Repeat with other side.
 Almost done now!! After pressing the button placket to the inside, pin in place. I pinned my working on the inside but left my pins sticking out a bit so I could pull them out while working from the top of my dress. Be sure to match up the stitch line and the folded edge of the placket while pinning in place. This way when you are stitching on the top side you will be sure and sew the placket in place and not "miss" it in spots.
 When stitching around the placket, stitch as close to the edge as you can. This will make your finished dress look more proffesional. Now drum roll.....
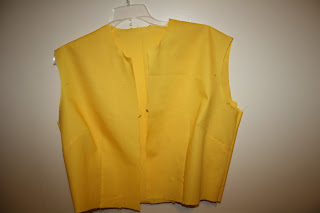
 Here is what we got! This dress is almost done now, all that is left is to add the collar and button holes tomorrow. Until then, Happy Sewing!!
Sharon

Wednesday, September 28, 2011

A Christmas Dress, very early!

I know it's a bit early to be thinking about Christmas but I was lucky to be able to test a pattern for Ellie Inspired this month and this beauty has Christmas written all over it! If you haven't seen her wonderful patterns yet you need to go check them out here. Warning lots of photos in this post!!
The whole dress is done in an off white with a golden brown ribbion sash around the waist. THe front bodice is smocked all by hand, my first outfit smocking ever!
Here is a closer look at the front bodice, sorry the sash slipped up a bit with Sweet pea wiggling around and trying to play. The collor and the end sleeves are trimed in a lace, love this part! Gotta love the look in her face here, lol.

This was a wonderfu way to cheer me up, I love that about sewing! I was able to spend some timeing chilling on the couch smocking watching movies with the kids all weekend so this was a fun project.


Happy Sewing!! Sew along will contuniue tomorrow morning!

Sharon

Friday, September 23, 2011

Sorry

I just wanted to say sorry for not posting the rest of the sew along yet. I have been sick still from surgery...over a week later. I will start the sew along tomorrow where we left off. When I am sick and on the couch with little ones at foot I really don't feel like getting up and doing anything all. Sorry again!

Hope everyones weekend is great!!

Sharon

Wednesday, September 21, 2011

Traveleer Sew Along Day 2!

Good Morning! Today we will be working on darts and sewing together the shoulders and sides of our dresses.

To start off take your back yoke and two side yokes (if you are making view A or B the back and side pieces will be long but for view C they will only be the short bodice pieces) and sew a stay stitching around the top of the fabric pieces. The stay stitching should be close to the stitching line that will happen in the constrution of the dress later. The seam allowance is 5/8" so make the stay stitching 1/8" on the outer edge from there. (see picture above)
Now onto the darts of the dress. This was my first time sewing darts seeing everything I sew is for the kiddos here but I have to say they were not hard a all, much like pin tucking. Just take it one step at a time!

First fold the right sides of the fabric togehter matching up the dart marks you transferd from the pattern. I found this easier to hold my fabric up to a light to match up these marking better.
Now we will be working on the wrong side of the fabric, pin the dart in place. I placed my pins to the right side of the dart so it will be easier to pull the pins out as I am sewing.
Start sewing the dart at the wider end and contntuie onto the smaller end folling the marks trasferd from the pattern. Do not back stitch at the end though, leave a long tail of thread at the end.

Here is what the end of the dart should look like, if the end would be finished ith back stitching it could make the end of your dart puckered  which wouldn't look good. So we are going to tie ours off by hand to make for a better looking dart.
After I make my two knots I trim off the extra thread. (see below)
Now press your dart to the middle back of your bodice.
See how nice the right side of the dress looks now?!? Now repeat with all remaining darts on the back and side bodice pieces.
Now for the side darts press them towords the center front. If your making the view A or B This is where you'll sew the pockets together and add them to your dress.
Onto sewing the bodice together. Pin the shoulders together and stitch then finish the seam allowaces with a serger or a zig zag stitch along the edge of the fabric with your sewing machine. (do same for veiw B & A) Now pin the sides together and stitch in place, then finish the seam allowaces.
This is where we'll leave off for today. Our darts and bodice (dress if view A or B) is sewn together!

Happing sewing!!

Sharon

Sunday, September 18, 2011

Traveler Dress Sew along Day 1!

traveler dresses sewing pattern

Today is the day we will start our dresses for us ladies! First off I will say I am still under the weather after surgery so I only made the dress version C for now. Everyone can make which dress they chose though, what ever you like best! (It is strange to me that I didn't sew one thing this past week or even want to for that. I am  soo ready to be over this sick feeling all time! )


Now onto the fun part!! Today we will be tracing our pattern pieces for our dresses. Each dress calls for different pieces, they are listed on the front sheet of the pattern directions. I like to write down a list before I lay my pattern down so as to not forget to trace one off.  I use cheep old tissue paper from the dollar store for my tracing paper. When I need a bigger piece I simply tape two pieces of the paper together, easy peasy!

Now really important to remember as you trace your pattern pieces out is to be accurate so I lay some paper weights down around the pattern piece I am tracing out and (2) be sure to copy all the pattern markings onto the tracing paper. (see below)
Next we are going to cute out all the pattern pieces, be sure to copy any pattern markings onto the cut out pattern pieces with a fabric marker. That's it for today. Tomorrow the sewing begins!


Sharon

Wednesday, September 14, 2011

Apple Picking Dress Pattern Review

 Let me start off I made this dress Sunday night, the night before I had my surgery. I haven't even thought about making anything since then yet,well maybe thought about it lol. This is the one of the three new patterns for Oliver + S, it's called the Apple Picking Dress. This pattern is already favorite of mine!
 The dress sews up quickly, it took my about 3 hours but not any more than three hours. There isn't really a lot of pattern pieces to this dress, only 9. The directions are very easy to follow and the end results are stunning!
 The collar is cut along the bias and has these beautiful ties that go into a lovely bow at the front neck line. The front of the dress has two rows of buttons that goes down into a drop waist line. Only one row of the buttons really work as to keep the dress from being heavy form the button plackets. Very lovely detail!
 This was the perfect dress to make before surgery, I love the little dress on my Sweet pea. It is short enough for her to play in but still beautiful enough for church on Sunday morning.
Happy Sewing!!

Sharon