Showing posts with label Bitty Beatrix Blouse. Show all posts

Tuesday, August 18, 2015

Bitty Beatrix Sew Along Day Three

Welcome to our Third and final day of the Bitty Beatrix Sew Along!! Today we will finish sewing this cute blouse up. We will tackle sewing the arm opening, I love this clever way Theresa wrote this pattern for this part! So lets get started!! 


**First before we start be sure to read all directions of the pattern first.**

1. This step is something I do myself and is not in the pattern. I serge the edges of both the front and back bodice lining pieces. Do not rim off any of the pieces, I just finished the edges. 


2. Now onto the closing the arm holes. I have lots of pictures for these steps so if you fins it tricky I hope this help. Take the left side of the bodice. Separate the lining part from the main and open up with the right side of the main/lining bodice up. (see picture below)


When you open up the bodice pieces lay the ruffle sleeve facing in towards the center seam. 


3. Now take the right bodice arm opening piece and roll it over to the left side and place it the right side in the center of the left. (Be sure that the right side is rolled up nicely so you are sure not to stitch it)


4. Now take the un-sewn edges of the left side and then place right sides together (with the right side still rolled up in the center) and pin the raw. 


Stitch together. trim sewn edges well them turn right side out. 


Press well then Repeat with second side. 


5. Sew two rows of gathering stitches to the top skirt. Gather the threads to fit the bottom of the front bodice and pin only to the main front bodice. (be sure to pull the lining bodice out of the way. Sew together then press the seam up towards the bodice. 


6. If you are adding lace trim sew it on at this point. I take my lace first and press it in a curve with a steam iron to better shape it into the bodice curve. Then pin onto the front bodice with the bottom of the lace just over the bottom of the top bodice edge. Stitch on both top and bottom edge of the lace in place. (I also leave a bit of the lace over hanging either side on this step.)
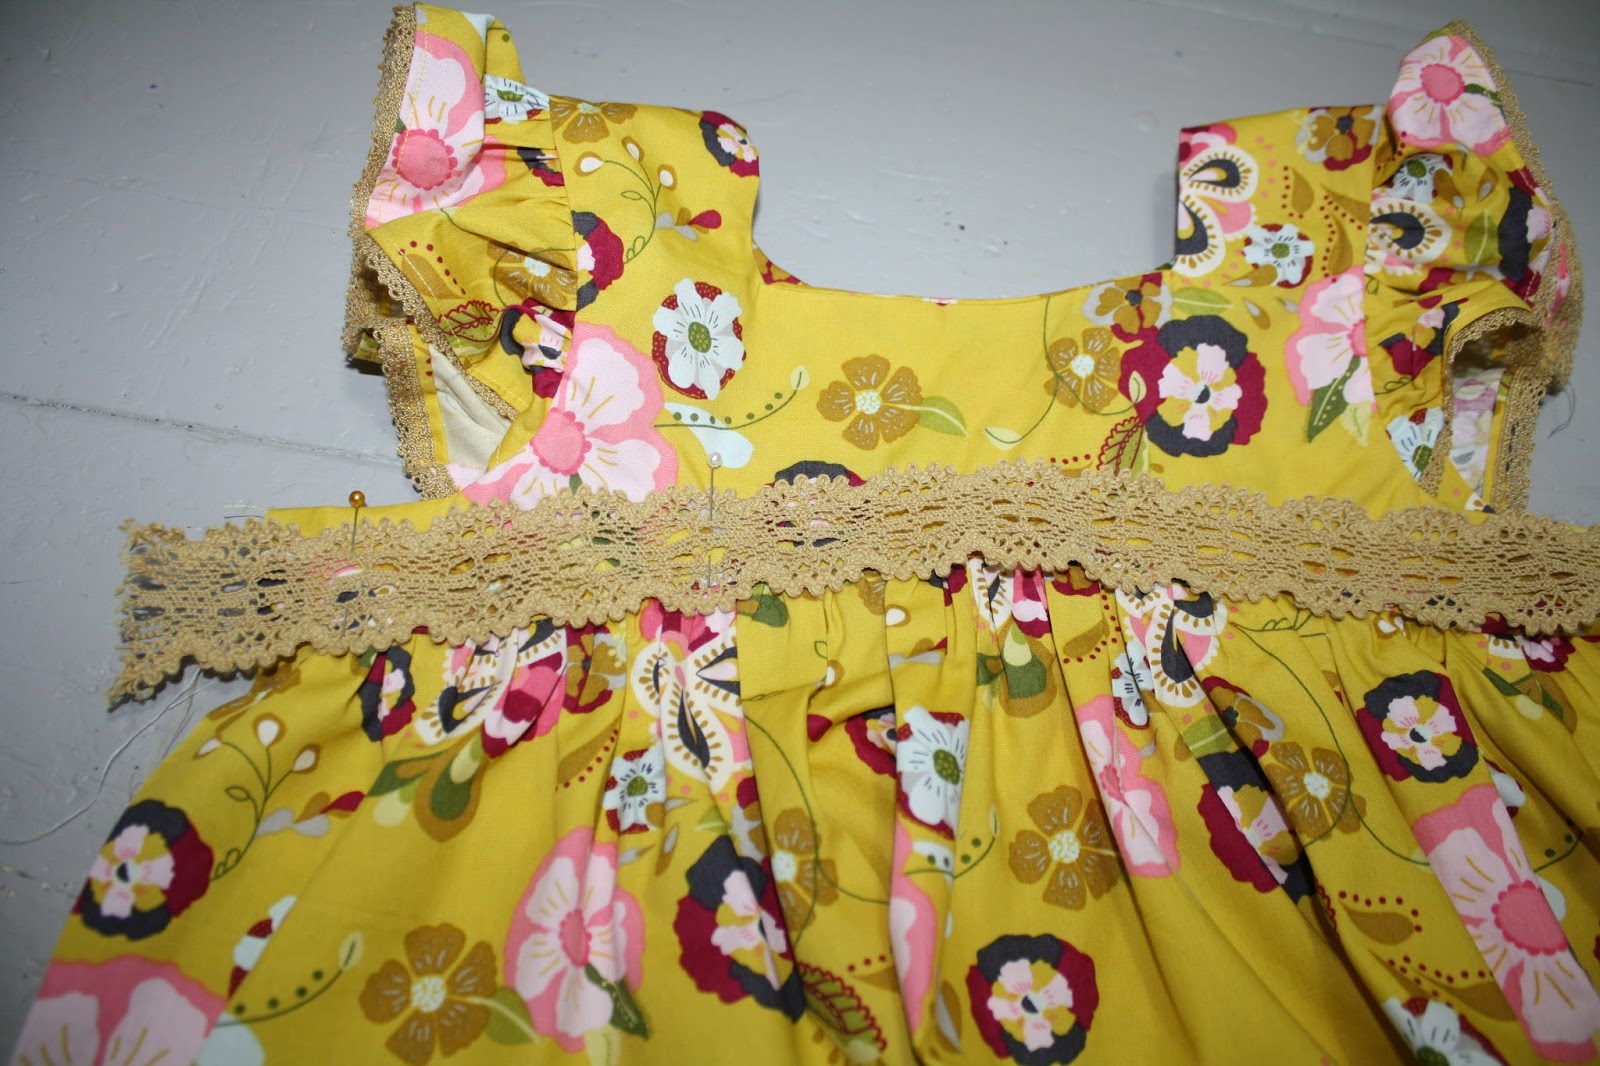

7. Take the front and back bodice and pin them together with right sides facing, including the lining bodices. Stitch then finish the raw edge. Repeat with second side. Press side seams and then press the lining bodice into place in the inside of the bodice. 


8. Now the pattern calls for the lining to be press under a 1/4" then hand stitched into place. This is where I did mine different and as why I serge the bottom edges of the bodice linings. 

I smoothed the inside bodice linings into place then pinned the main front bodice to the lining bodice. 

Outside view. 


Inside view. 


Stitch the lining bodice in place by stitching on the right side of the bodice right over the bottom lace stitching line. If you do not have lace stitched onto your bodice then stitch in the ditch of the bodice and skirt seam. 


9. To finish up the back bodice take the wears right side and measure over a 1/2" and bring the edge of the right side over a 1/2" then press. It will leave a pleat in the back of the bodice. 


I just pressed mine very well and did not stitch this in place just because I love the look of the back bodice this way. 


Mark the button holes according to the pattern directions then stitch. Very lastly hem the shirt with a narrow hem. 


That is it, we are all done!!! Oh I also added a lace bow to the center front bodice. 


I hope you had as much fun as I did! Be sure to add your finished photos to the Grammies Dolls Face Book Group! 


Sharon

Bitty Beatrix Sew Along Day Two


Welcome back for day Two of the our sew along! Today we will starting sewing our top. 


1. To start out today first cut a piece of interfacing 3" wide by 4" long and fuse to the center top of the back bodice piece. Find the center of the back bodice and draw 3" line right down it. Then draw another line a 1/4" to the left and right of the center line for a stitching guild later. 


2. Pin and Stitch both front and back shoulder pieces with the right sides together. Repeat with the bodice lining pieces. (I also finish all my raw edges as I go)


3. Take your sleeve ruffle and press the bottom down a 1/4" to the wrong side and then again to the wrong side a 1/4". 


4. Stitch the outer most fold. I added trim to mine so I pinned my trim on first then as I was stitching I also stitched my trim down as well. Repeat with second sleeve. 


5. Sew a gathering stitch across the top of both sleeves. 


6. Find the center of the sleeve and pin it to the shoulder seam, right sides together. Then measure the bodice side in a 1 1/2" and pin the edge of the sleeve there. Them measure again a 1 1/2" in on the other side of the bodice and pin the second side of the sleeve. Adjust gathers on the sleeve to fit. Baste in place. Repeat with second sleeve. 


7. Now slip your bodice lining over your main bodice with the right sides together. Place the main bodice wrong side up, pin the lining and main bodices together. 


8. I take an extra step here to help my front corners turn nicely. I take my quilting ruler and measure in a 1/4" square for the seam allowance on the front bodice lower squared edge. Mark the 1/4" inside corner spot. Repeat this on the second side of the front bodice.  


9. Stitch around the neck line all the way around, be sure to stitch your back bodice on your stitching lines you made. 


Trim your seams and corners very well, turn and press. 


Be sure to roll your bodice lining to the inside slightly as you are pressing the bodice. 


We will leave off here today and finish up sewing tomorrow. 


Happy Sewing!!

Sharon 

Thursday, August 13, 2015

Bitty Beatrix Blouse Sew Along!


With school starting here next week I though I would have my own little sew along fun here on my own blog as well. (Remember the Mamie Dress starts over on the Whimsical Fabrics Sew A-long blog as well!) The sew A-long I am hosting over here is the Bitty Beatrix Blouse from Grammies Dolls. This is a really cute top that sews up fast. Sweet pea already has two and now third one for layers in the cold months. 


This is her #1, a lacy fabric trimmed in cotton lace on the sleeves and bodice. 


Here is our top #2. I made this one after another blouse she wanted. We both are happy with the way this one came out....and with the skort I made to match it! (I think I forgot to blog about these, I will have to do a "How she wore it" blog post the first month of school to show off all her new outfits!)


I made my own piping for the bottoms to match the top, loved how these came out so much! 


Lastly top #3! This is our fall one, made in Art Galley fabrics. I love the colors of this one. All my favorite colors of fall are in the print. 


I hope you will join me next week for a three day Sew along starting Monday. 
If you need the pattern Bitty Beatrix Blouse you can find it for sale here. 


Happy Sewing!! 

Sharon 

Monday, July 27, 2015

The Bitty Beatrix Blouse: A Tutorial on how to add a center panel


A new favorite pattern of ours if the Bitty Beatrix Pattern form Grammies Dolls. This is our second one to date and we have a third planned as soon as our fabric arrives in the mail. This top is made after another my daughter seen and loved so we made our version of it. I though I would share today on how we added the center panel to the bodice. (It is so easy to do too!)


First, of course, print your pattern. Then you need to two front pattern pieces. I angled mine but not as much as the neck line. Draw a line on where you want your angle at. 


Then cut the two pattern pieces apart. Also be sure to mark on the "side" panel where the "center" panel came up to. 


Then add your seam allowance back in when you cut out your fabric pieces. (This pattern is 1/4") (Please ignore the missed spelled Hear for here, lol. To my defense I was helping children with spelling words at the same time so I used the wrong word.) 


Then sew the center panel to the side panels with a 1/4" seam and press the seam towards the side panels. Sew the rest of the pattern as directed. **A side note, when sewing the lining to the front bodice be sure to pivot the needle on the seam line of the center/side panels.** I also added a full skirt to mine as well so I would only have to cut one boarder piece. To do this just shorten the back bodice piece to the length as the lining bodice piece. (Really just use the same pattern piece for both is what I did, easy peasy) 


I also added a bias bow to the bottom bodice. I cut my bias 1 1/4" then pressed it in double bias fold and stitched the outer side. (I forgot it at first until Sweet pea asked me where it was, oopps!)


She loves this top more than the original one, mostly because of a pink elephant on the center front. It pairs so nicely with her O+S Badminton skort as well. Well both of them really. I have a new pair of bottoms that matches this top perfectly but I can't show you just yet. ;-)  


I love the bodice of this top and how it gives it a high/low look to the skirt portion. 


One more mix and match outfit for school done! I have a few more things on our list before I am all done but I am almost there. 


Happy Sewing!! 

Sharon