First of all Happy New Years!!! We just got back from vacation on Sunday morning. We went up to Illinois to see my folks and family for the holidays, I am still a bit tired. I have to say it was the best Christmas ever!
Remember this dress? Here is the tutorial on how to make it. Sew in a 1/4" seam allowance, it takes about 1 1/2 yards to 2 yards of fabric to make this dress. You'll also need double folded bias tape, I used white but you can make your own to match the dress. Let's get started! :)
Step 1: I already had my pattern top pieces cut out so I will explain how to cut then out, I used a shirt of hers to trace the pattern out. For the front bodice I traced the
whole bodice first. Then to make the diagonal cut, draw a line down from the neck line, a few inches down, to the top of the arm hole on the opposite side.
For the back of the bodice, trace from the center of the back to the arm hole. This piece will be cut on the fold of the fabric.
Step 2: Now to cut out the pattern pieces. Cut out two back pieces
on the fold. One of the main fabric and one for the lining.
Cut out 4 pieces of the front bodice, two for the main fabric and two for the lining. Very important, make sure you cut out the fabric one for each side, the fabric should be folded with wrong sides together so that two pieces of the fabric are cut out at the same time, one for the front of the bodice and one for the lining of the bodice. Do this twice to have the 4 pieces of cut the right way.
Cut out 2 pieces of fabric for the ties as well, mine for this dress was 30"x 2 1/4" but for the pink dress I made the tie wider, 2 3/4" wide.
Cut out three pieces of fabric for the skirt (not pictured). The skirt will be in three pieces, the front, the back, and the inside of the front. To figure out the width of one piece, double the width of the bottom the front bodice piece. ( All the bodice pieces will be the same width). For the lenght of the skirt pieces figure out how long you want it to come down on your little girl and add 11/2" to that. ( 1/4 for top seam allowance and a 1 1/4 for the bottom hem.)
Now to cut out the sleeve fabric, you will need 4 pieces of this, two for the main and two for the lining fabric. The middle will be 3 1/2" cut, mark this first. (it is much easier if you have the fabric start on the fold so the both sides are the same). Then to get the lenght of this piece measure the arm hole opening and times this by 1.5. Remember that on the piece you are cutting out in in half so be
sure to divide this number in
half so the sleeve is not to wide. Mark this spot at the other end. Then draw a line from the highest point to the lower point and cut out. Use this piece as your pattern to cut the other 3 pieces.
Step 3: Now we are going to sew the ties together. Take a piece of the tie fabric that is cut out and fold it in half long ways, press and pin in place. Stitch together with an angle at one end as shown in picture above. Leave one end open for turning. Do this with other tie as well. Now cut out two pieces of 1/2" double folded bias tape, cut two pieces 16" long. This will be for the inside ties. Sew the open side of the bias tape closed to make it into a tie.
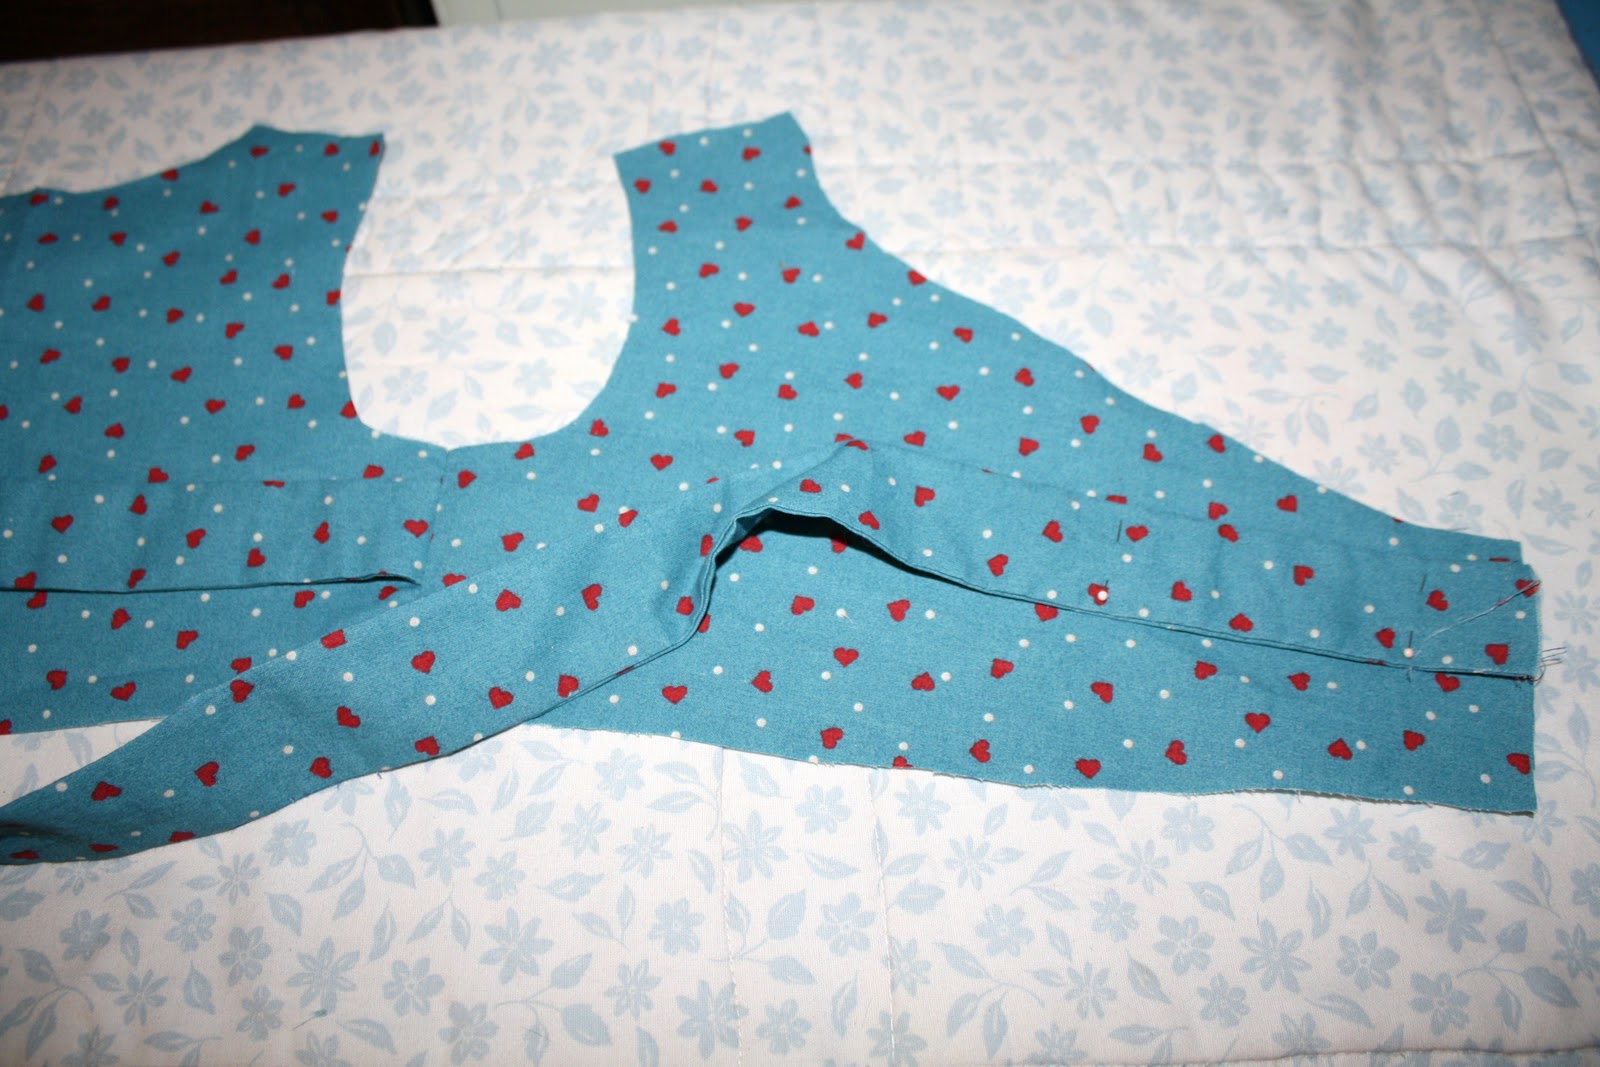
Step 4: This is very important that the pieces be laid out and pin right so the ties will be where they are needed. For the main part of the bodice lay out the back, front and inside piece, pin in place at the
side seams only. With the three pieces pined in place put the tie back on the right side and then pin it in place, this needs to be 1/4" from the top of the fabric. (use photo as guide).
Now pin the three pieces of the lining toghether at the side seams. place a bias tape tie at the left side a 1/4" down form the top of the fabric. (use photo as guide)

Now stitch the side seams in place, press open. Then press the bottom of front and lining down a 1/4".
Now with the right side of the main bodice facing out, place the second tie back onto the left side of the front bodice piece down a 1/4" from the top of the fabric, (see photo)
With the same main bodice piece, take the second piece of the bais tape tie and place it on the left side fo the bodice down a 1/4" form the top. Then take the lining of the bodice and place with right sides toether and pin in place, being carefull that the ties are pined in place as well.
Sew the bodice
only the front sections and the back of the neck, leaving the arm holes and the top of the shoulders open. (See photo above to see where to sew) Clip the fabric in the curves, turn and press.
Step 5: Now we are going to sew the shoulders up. Take the front and back bodcies pieces toghether, open them up and pin in place as shown in picture below. Make sure that the two seams from th fornt and the back of the bodices matches up.
Sew toghether, turn back to right side and press.
This is what it will look like after it is sewn and pressed.
Step 6: Take the 4 sleeves pieces, pin two toghether with the right sides toghether. Stitch in place, clip along the curve, turn and press. Now along the open end run a gathering stitch.
Take the middle of the sleeve and pin to the top of the arm hole. Gather the half of the sleeve with the bottom of the sleeve going a 1/4" past the center of the bottom of the arm hole, pining in place. Repeat for the other half of the sleeve with the bottom over laping the other side of the bottom of the sleeve.
Stitch in place, then zig zag stitch thraw edges or surge them. press in place then top stitch 1/8" away from seam line.
Repeat with other sleeve.
Step 7: To make the skirt, take the front and back pieces of fabric and pin together with right sides toghether. Stitch in place, them zig zag or surge the raw edges. Now take the inside piece of the skirt and pin to the the back pieces with right sides toghether, stitch in place and zig zag the raw edges or surge.
You will have a long rectangle piece of fabric now. Hem the two short sides by pressing under a 1/4" then a 1/4" again and stitching in place.
Now we will hem the bottom of the skirt, press under a 1/4" than 1", stitch in place.
Now run a gathering stitch along the top of the skirt. Do this in three sections across the top, one for each section of skirt incase the string brakes so you won't have to do the whole thing over agin. Gather the skirt and pin in place to the front of the main bodice only, lining up the side seams. Place the hemed side edges right next to the side pieces of the bodices. Play around with this until it is the way you want it. Stitch in place.
Be careful as to not sew the lining of the bodice to the main part of the bodice while sewing the skirt on.
Press open.
Step 8: To finish off the bodice we are going to sew the ling of it closed. Now working with both sides and pining from the front of the bodice, pin the front of the bodice to the lining of the bodice. The lining of the bodice was pressed under a 1/4" form ealier for step 4, make sure the pressed part stays under as so all the raw edges are tuck in nicely. (see photo above)
Stitch with a 1/8" seam allowacne from where the skirt and the bodice are attached all the way around.
This is what the inside looks like when they are stitched toghether. Now you are done!!
The two bias tape ties are tied into a bow on the inside of the dress.
Here is the front of the dress and the back. Let me know if I left anything out or if you have any questions!
Happy Sewing!

![]()

content/uploads/2010/01/button2.jpg" />