Tuesday, May 31, 2011

My New (old) Sewing Machine!

Isn't she just beautiful?!? My Mother-in-law and Father-in-law gave me this wonderful Singer sewing machine! I was so excite to receive it. :) They found it at a yard sale about a month ago. All I know is that it works and need the top spool part and that it is a 1951 sewign machine.

I love the beautiful detail work on this machine! It stores in a cabnet and opens up to sew. They don't make them like this anymore!

The sewing machine is in great shape and all the detail is still there. It has this gold paint and here is the side of the machine, I really love the detail here!

It's light still works!

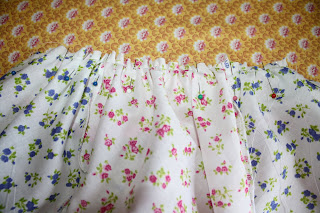
Here it is in it's new home! I just painted my room a couple of weeks ago. What do you think of the color? I bought two gallons of this paint marked down to $5 a gallon pail! A really greeat deal. :) I just sewn up this valance this weekend, a sneek peak at this weeks tutorail. :)

Happy Sewing!
Sharon

Thursday, May 26, 2011

Tea Party Dress

Yep, another Oliver + S! This is their Tea Party sundress. I made this for Sweet pea for my youngest son's preschool graduation yesterday. I have to say that this dress outfit sews together very easy and quickly! I started it the night before late and finished it right before we had to leave for his graduation the next day. I had no problems with making this dress!

I really do love this dress! It has flat piping around the bottom of the bodice, it's a nice way to add a little bit color. :)

I bought the fabric for Hobby Lobby. I love the polka dot fabric and have had my eye on it for some time so it was nice to use it for this cute little dress.
And it's great for eating cookies in it too! yummy!

Under the dress is a matching diaper cover too. :)

Happy Sewing!!
Sharon

Tuesday, May 24, 2011

YAHH!!!

With no time to spare I finished the boys' pants for their outfits for graduation! (which is tommorrow) I havn't had time to take their pictures in thier new outfits yet so here is just the pants.
I used the Oliver + S scetchbook shirt and Shorts pattern. For the shorts I just made them longer into pants. The pattern was so easy to follow! This was my first time using an Oliver + S pattern and now I am totally hooked!!

I even pressed the pants when I finished them. :)

I love the real pockets and "fly". I can't wait to see the boys in thier outfits tommorrow morning!

Here are thier shirts again. :)

If you havn't tried a Oliver + S pattern yet I recomend them!!

Happy Sewing!!
Sharon

Friday, May 20, 2011

Two More Shirts done!

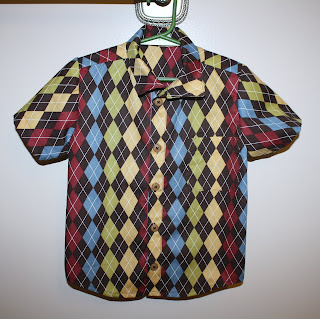
Well, I haven't sewn as much as I would have liked to this past week but I did finish two more Oliver + S sketchbook Shirts for my other two boys.
This shirt is for my youngest son. He is graduating from preschool on Wednesday! :) He picked out his fabric and buttons too. It makes this shirt even more special.

This shirt is for my oldest He doesn't get a graduation but I thought he would love a special shirt too. He was the only boy who picked out his fabric within the first few minuties of being in the store. He knew what he wanted. :)

This fabric is very soft too. I love the feel of it. (sorry for the lopsided pics)

Now all I have to do is pin, cut out and sew all three pants! Plus I want to make Sweet pea a dress too.  Only if there was more hours in day.
Have a great weekend!!

Sharon


Thursday, May 19, 2011

Bandana Dress Tutorial

I have been so busy with Sweet pea this past week that I really haven't been able to get much done, sewing, house cleaning, laundry.... but yesterday Sweet pea and I laid down in hubby and I's bed and got some much needed sleep. I feel so much better now!
So a week late to post but finally here it is!
The bandana Dress Tutorial!

I used the same pattern as The Carolina Dress but just changed it up a bit. To get the print out pattern go here.

Supply list
*6-8 bandanas, depending on how much abric you'll need for the skirt
*matching thread
*1/2" elastic

**sew in a 3/8" seam allowace**

Step 1; print out the Carolina Dress bodice pieces. Next shorten the bodice, I took off 1 1/2" off mine. Repeat with the back bodice piece as well.

When you cut you back bodcie piece be sure to take it off from the bottom and not the top. I did mine from the top and cut my top stitching lines off. Opps. If you do though don't worry and mark new lines on the back bodice 3/4" from the top of the pattern piece. (there will not be any bottom stitching on this dress.)

Step 2; cut out your bodice pieces. I like the soild strip on bandana so I cut the back out with the strip as the top of the back bodice. When cutting out the front bodce be sure that you cut with the grain and not the bais.

Step 3; Next cut out you ruffle. I cut out the border of the bandana the full length of one side. THis way I don't have to finish the edges of the ruffle. If you need a longer ruffle just piece together two sides of the border edge of the ruffle.

Step 4; Now we are going to cut out our straps. On this step you will cut them out on the bias of the bandana. The bias will give the straps stretch to them. Cut them right from the center of the bandana from one corner to the other corner 2" wide. cut 2

Step 6; Take the two pieces you just cut and iron them in half by brining the edges to the center. Next fold them in half by brining the two outer edges togehter and press. Stitch down the open end side useing a 1/8" seam allowance.

Step 7; Now grab your lovely assintant...

and place one of the straps from one front shoulder over the back to the oppisant shoulder (criss cross). Measure how long you want the strap to be and ass a 3/8" to both sides and cut. Use first strap to measure and cut second strap. This way they will both be the same lenght.

Step 8; Piece together the loining bodice pieces and the main bodice pieces together same as the Carolind dress. BUt before you sew the frot bodice pieces to the lining piece we need to add our ruffle. Run a gathering stitch down the raw edge of the ruffle cut piece. Gather and pin to the front bodice on the right side. Baste in place.

                                      
Step 9; take both of the straps the pin them in place just inside of the curve of the front main bodice. Criss cross the ties after pinning.

Take the crossed ties and bring them up to the top of the back bodice from the under side of the bodice. Pin in place.

Now place the lining bodice over the main bodice with right sides together and pin.

Stitch the whole way around the top of the entire bodice. clip the curved areas and turn then press.

This is what you'll have! A nice criss cross straps for the top bodice. :)


Step 10; top stitch around the front of the bodice only useing a 1/8" seam allowace.
Step 11; Flip the bodice over to the back and mark your stitching lines useing only the top stitching lines on the Carolina dress. Stitch across the back to form your casting for the elastic.

                                     
Step 12; Now we are going to make the skirt. Take your bandanas and cut them in half from one corner point to the other. ( a big triagle) Now take on piece and fild in half again. Measure out 6" from the center point and cut. The center piece will be the skirt panel. Repeat with the rest of the bandana pieces. ( I used 5 pieces on a size 1 but for a bigger size you will need more.)
Now take two of the bandana pieces and pin them together on the cut side (as shown in picture) and stitch together. Finish raw seam with a serger or zig zag stitch. repeat with all the bandana pieces. When on the last two pin them together from the ends of the skirt to form a circle, pin and stitch in place and finish seam.

Run a gathering stitch around the top of the skirt a 1/4" from top edge. Gather and pin to the outside bodice only, stitch in place.

Step 13; To finish the dress go here and follow the Carolina dress tutorial.


And now your done!!
Happing Sewing!!


Sharon

Wednesday, May 18, 2011

A Fantastic Find!

While looking through different fabric stores at night I came across this too cute fabric for children. (Sweet pea is still not feeling well, she is up almost all night long). It is from Sarah Jane Studios.

Not only does she have fantastic fabric but she makes the most wonderful prints and book too! It reminds of care free childhood days. :) You can buy from her shop here. I know a few things I am going to make with this wonderful fabric.

As soon as there is a 100 followers of Sweet pea & Pumkins I will have a fabric give away of her cutest prints! I just love to share!

Sharon

Monday, May 16, 2011

Little Bit of This and That

This past week I wasn't able to get done much on anything because of Sweet pea wasn't feeling good but I was able to get a few things sewn.
Here is shirt #1 form my new Oliver + S pattern. My two yonger boys are granduatring from 4K and 5K this year so I want to make all three boys a new outfit for it. It is the Sketchbook shirt, it sews farley easy and didn't take too long but tracing the pattern out seemed to take forever. All the boys wears different sizes so I still have to trace out the other two sizes I need. I do really love the pattern! It was alot fun to sew!!

What I love the most about this shirt is that my son pickout the fabric and the buttons for it by himself. This shirt really is him. :)


I also made Sweet pea this little crayon tote for church. It was made out of scrap fabric so it didn't cost me a thing. I found the tutorial over at The Crafty Cupboard.

Remember ths dress, well I love it si much that I decided to make one for Sweet pea too!

I lve the little animal print and the rick rack that is on the bottom of the dress.

And how cute is the bloomers!

Here is Sweet pea helping me with her dress, I love this cute little face!!
I have also been working on my bedroom. I am almost done painting the walls and the dressers are next. What have you gals been up to?

Sharon