I shared with you the other day two different pairs of ruffled lace leggings I made my Sweet pea, she loves them so much and has requested two more pairs. That really makes me feel so good to hear my kids request sewn items! So today I will share with how I made these cute leggings. (Also for me to remember how made these for next year. ;-) }
I used the Oliver and S Play Time pattern for the leggings, 100% cotton 2" wide lace, 1/4" elastic and some satin ribbon for the green pair. (The ribbon is option and does not need to be added.) I chose to use use a different colored lace on both pairs as well. The knit fabric I used for both pairs I used the knit fabrics from Whimsical fabrics. I buy all my knit fabric from them right now, I really love the price and fast shipping.
1. I took my pattern piece and pinned it to my fabric first. Then I found the center of my legging at the bottom pant leg and marked 1" away from the pattern piece with a fabric marker. Next I drew a curved shaped tapering it at both ends to meet the original pattern piece at the bottom sides.
2. I then hemmed my pants according to the pattern directions but left the side seams un-sewn.
3. I then folded my legging pant bottom in half to find the center and measured up 4 1/2" and marked it. (My pair is a size 6 for the smaller sizes you might not want to measure up as high.)
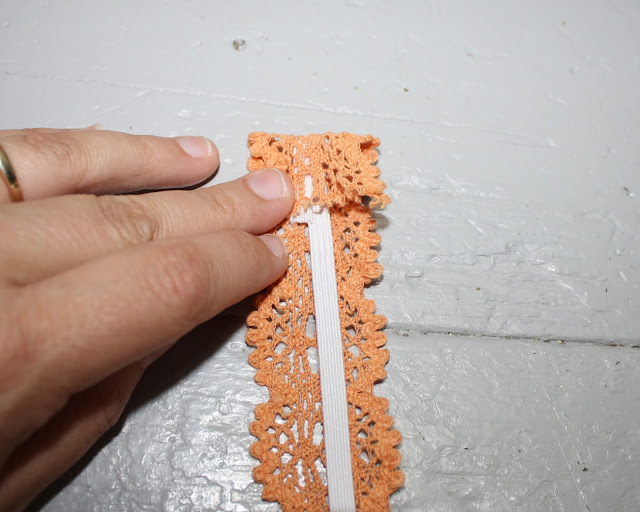
4. I then took my lace (Uncut) and placed it down with the wrong side up and placed the elastic on top of this in the center. The elastic should be even with the lace on this step.
5. Then I folded the lace (with the elastic sandwiched in between) down a 1/2".
6. I then took the center of the lace/elastic and place it right into the marking that I made and pinned the the lace and elastic all the way down to the the bottom hem line.
7. I sewn across the top, sewing through all the layers of lace and elastic.
8. I then sewn down each side of the elastic on the lace to form a casing for the elastic. Starting at the top and finish at the hem stitch line.
9. Pull the elastic to "gather" the lace up. On this part i just pulled the elastic until I liked the look. I then pinned the elastic in place, then stitched it down right over the bottom stitch line.
10. Then I took the elastic and pulled it to stretch it then cut it. The elastic will then "pop" into the lace so the end will not be seen.
11. Then I cut the lace just a little over 2" long on the end. (I cut mine off at the end of the pattern)
The fold it over once to meet the bottom of the pant leg.
Then a second time so that it was above the the hem stitching line, pin in place then flip over to the right side.
12. Then I stitched right over the hem stitch one again to finish.
That's it! I added a ribbon to the green pair but did not on the apricot pair. It looks really cute both ways I think. Either way they are a lot of fun to make!
Happy Sewing!!
Sharon


