I bought a fat quarter pack and a jelly roll pack for Wal-mart. I love the bright colors! I used the same colors and Sweet pea's pillows for her bed and I will be using them for a dress for her this spring. I am including the size the pieces are cut into so you can use any fabric and not just the jelly roll.
Cut this for the child size apron;
*top: 10"x 10"
*skirt: 14"x22"
*bottom ruffle: 2 1/2"x 43"
*top ruffle: 2 1/2"x 43"
*ties: (2) 2 1/2"x 43"
*waist band: (2) 2 1/2"x 14 1/2"
*top tie: 2 1/2"x 22"
cut this for the Toddler size;
*top: 6"x 6"
*skirt: 16"x 9 1/2"
*bottom ruffle: 2 1/2"x 32"
*top ruffle: 2 1/2"x 30"
*ties: (2) 2 1/2"x 16"
*waist band: (2) 2 1/2"x 10 1/2"
*top ties: (2)2 1/2"x 16"
***sew in 3/8" seam allowance***
Take the top piece and round the two top coners by traces a small bowl or cup.
Take the top ruffle and fold in half lenght ways, with wrong sides together. Press.
Run a gathering stitch on the open side of the ruffle, a 1/4" from the egde.

Match the center of the top to the center of the ruffle. Gather the ruffle up and work it until it it fits both sides of the apron. Pin in place.
.
Sew the ruffle onto the apron then serge or zig zag the egde to seal the fabric. Press open with the seam towards the inside of the top piece
Now take the apron skirt. Hem the sides of the skirt (the short side), press under 1/4" and then again another 1/4". Sew. Do this to both sides.
Take the bottom ruffle hem the short sides the same as the skirt (under a 1/4" and then again a 1/4" pressing and then stitch). Now take the bottom ruffle and press the bottom of it under a 1/4" and then again under a 1/4" and stitch.
Now run a gathering stitch on the top side of the bottom ruffle. Match the center of the ruffle to the center of the skirt bottom, gathering until you like the look. Pin place. Stitch. Then serge or zig zag the edge to seal the fabric.
Press the ruffle open at the bottom.
Working with the ties, fold in half lenght wise with right sides facing. Press. Stitch the closed with leaving one short end open for turning. I tarpered the sewn end.
Turn and press.
Now take the waist pieces and the top of the apron. Layer them all toghether. Lay the a waist piece down first with the right side up. Next place the top of the apron , centered on the waist piece, right side up. Last take the second waist piece and place it ontop with right side down. Pin in place and sew.
Press both sides of the waiste down towards where the skirt will go.
Open the waiste up with the top of the apron closest to you.

Gather the skirt with leaving a 1/2" of the waiste band on both sides. PLace the ties onto the top of the open waiste band as well.
Here is a close up picture of the waist band and ties. stitch the up the side (where the tie is) then across the bottom (where the skirt is pinned) and then up the other side (where the tie is). Sew the ties twice to reenforce.
open the waist band up with the wrong side up. Press the sides in and press the under a 1/4".
Fold over and pin in place, with the apron skirt sandwich between the waist band pieces.
Here is what the inside will look like.
Sew the the side, then across the bottom and up the other side again. Use a 1/8" seam allowance. Sew over the sides again to give extra streanght to the ties.
Take your top ties, you can use the single strap or the ties for this part. THe top ties for the child is the same as the toddler size. For the double ties, make the same as the ties backs. For the single strap, fold over long ways with right sides together. Sew the long end up with leaving the ends open. Turn and press.
Pin the ties onto the apron top onto the left and right sides. Sew a square to attach the ties onto the aron. That's it your done!!
I made a child size and the toddler size, I am not sure what I will do with the bigger apron yet. It fits my boys but the don't like it for some reason. ;)
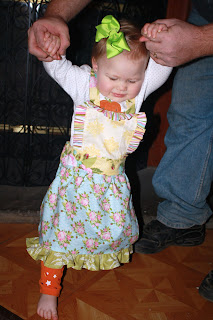
Sweet pea is ready now to get cooking! Next I want to make her a play stove and felt food. Maybe I make a pot holder to match her pretty new apron this week.
Happy Sewing!!
Sharon


Oh my gosh!! This is a great tutorial! Exactly what I was looking for. I will tried to get to this this week and let you know how it turns out. Great pictures and step by steps!
ReplyDeleteWould you recommend the child size for a 3 or 4 year old? Thanks for the great tutorial.
ReplyDelete